Running an analysis
Analysis is the core function of Siter. When you run an analysis, Siter calculates quantity-distance (QD) arcs for each potential explosion site (PES) based on the explosive quantities, facility types, and attributes you have defined. The results show required and actual separation distances for every PES–ES pair, flagging any pair that does not meet the selected criteria.
Prerequisites
- Your project must have at least one feature with a facility type assigned
- Features must have explosive quantities entered (see Feature explosives data)
- You must have the Project Edit Permission or higher to run analysis
How to run an analysis
There are several ways to run an analysis:
From the toolbar Check menu
-
Click the check button in the toolbar to open the analysis menu
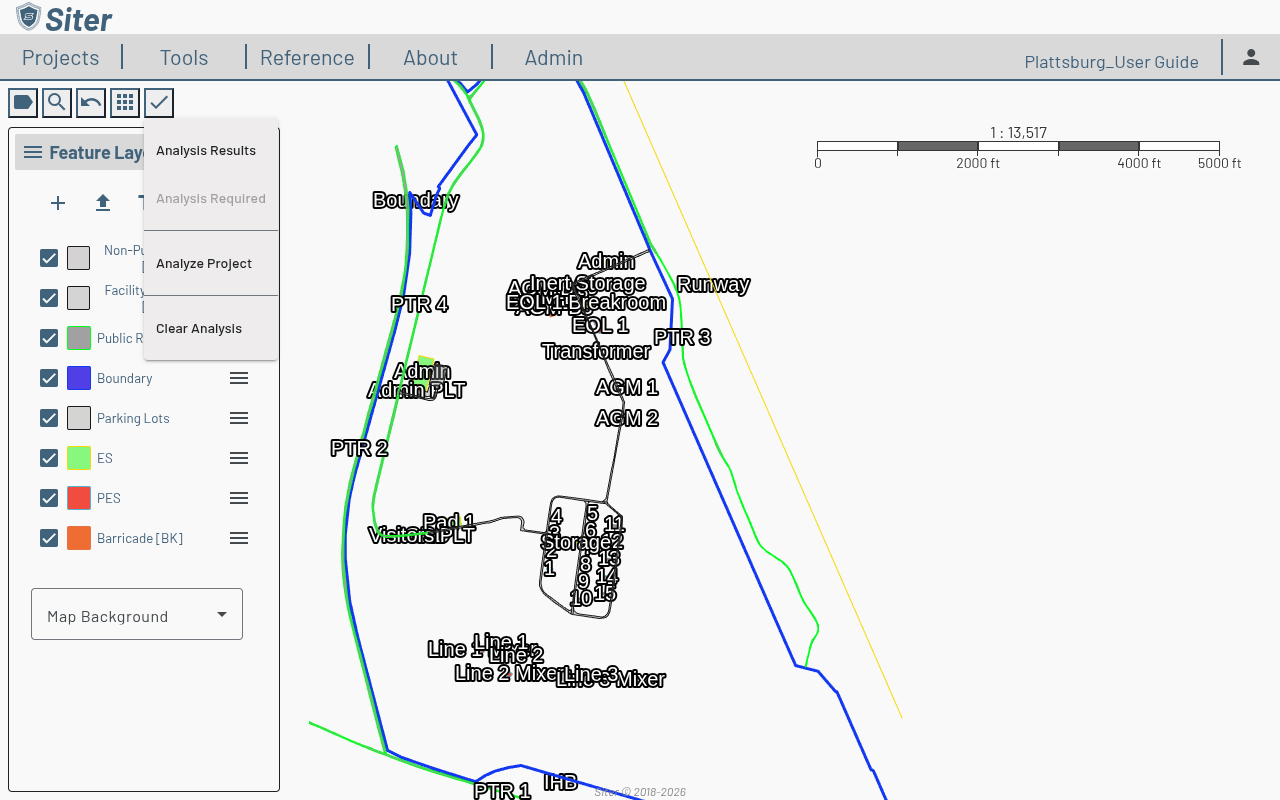
-
Select Analyze Project — Siter calculates QD arcs for every feature in the project
From the project dashboard
- Click the project name to open the project dashboard
- Click the settings gear icon and select Run Analysis
From the Analysis Results panel
- Open the Analysis Results panel (see below)
- Click the settings gear next to the Analysis Results title and select Run Analysis
The Analysis Required entry in the check menu becomes active whenever features or operating lines have changed since the last analysis run. Use it to jump to the list of features that need attention before re-running.
How to view analysis results
After running an analysis, results are available project-wide from the toolbar and per-feature from the dashboard.
Project-wide results
-
Click the check button in the toolbar and select Analysis Results
-
The Analysis Results footbar opens at the bottom of the screen with three tabs
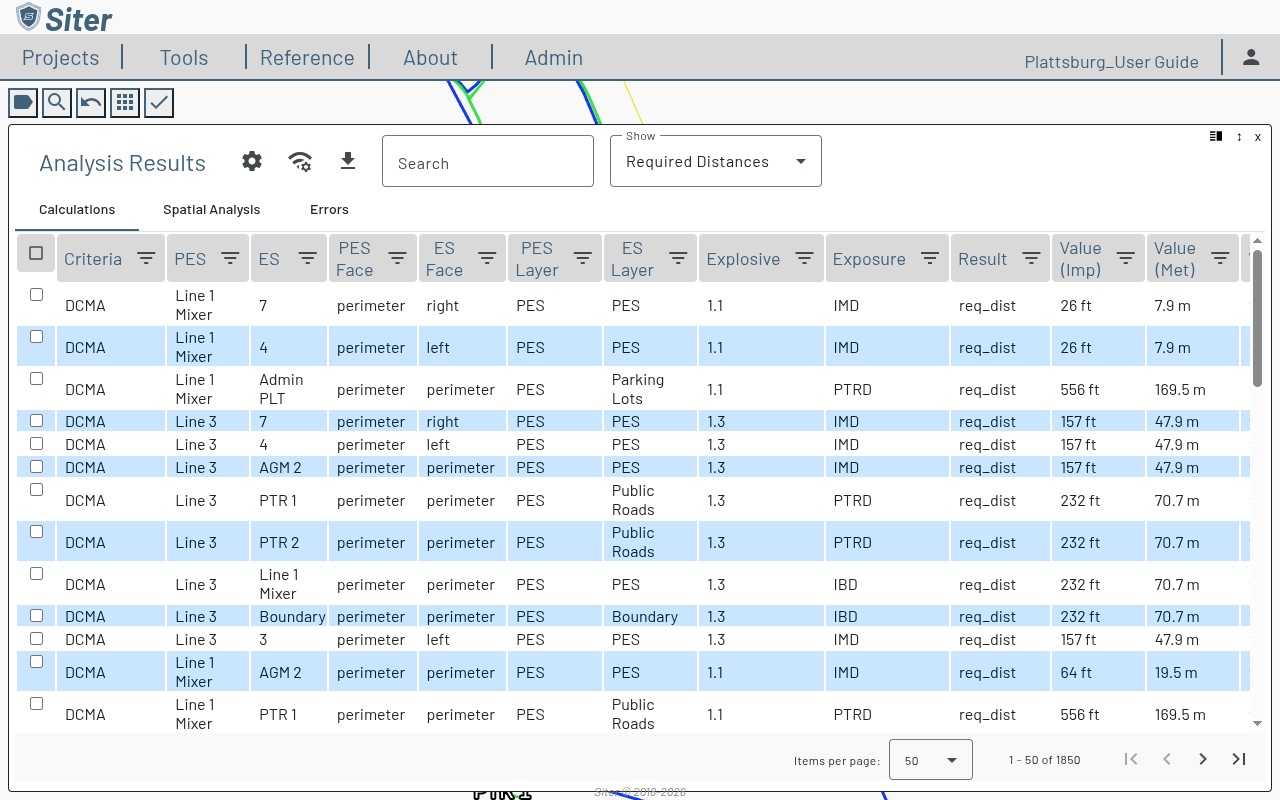
- Calculations — required and actual distances for every PES–ES pair, with violation flags
- Spatial Analysis — every nearby PES–ES pair the engine found, with the criteria type code in effect
- Errors — features that could not be analyzed and why
-
Use the Show dropdown to toggle between Required Distances and Actual Distances
-
Click any column header's filter icon to narrow the results
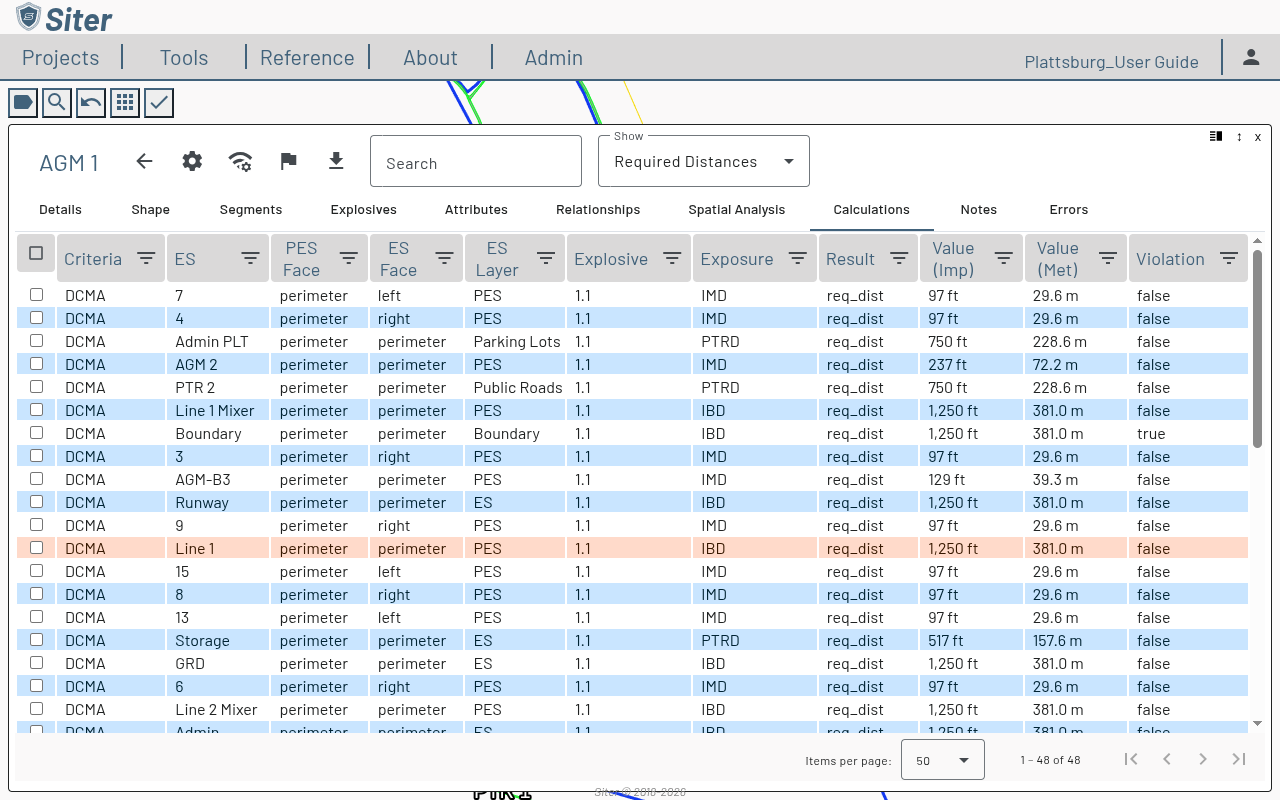
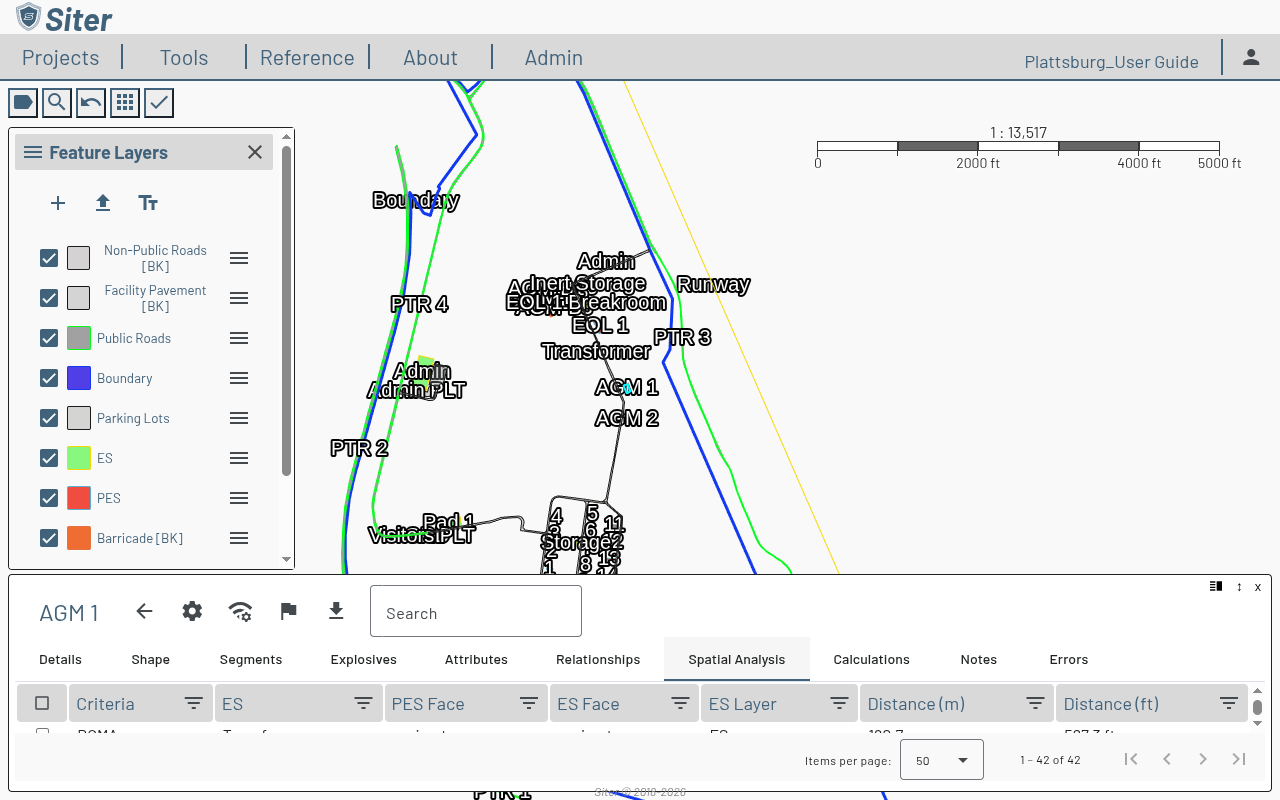
Per-feature results
-
Select a feature to open its dashboard
-
Click the Calculations tab to see required and actual distances for that feature only
-
Click the Spatial Analysis tab to see which nearby features are paired with this one
-
Click the Errors tab to see any data issues that prevented calculation for this feature
Understanding analysis results
Analysis results include:
- QD Arcs — circles drawn around each PES showing the required separation distances
- Violations — pairs where the actual distance is shorter than the required distance (Violation = true)
- Calculations — required and actual distance, plus the criteria, explosive, and exposure that governed the calculation
- Spatial relationships — which features the engine paired against each other
How to clear analysis results
- Click the check button in the toolbar and select Clear Analysis, or
- Click the settings gear next to the Analysis Results title and select Clear Analysis, or
- Open the project dashboard's settings gear and select Clear Analysis
Analysis results become "stale" when you modify features or operating lines. Stale results are not cleared automatically — re-run analysis to refresh them. Each analysis row carries a staleness indicator if the underlying data has changed since it ran.
Troubleshooting
Analysis shows no results
Cause: Features do not have explosive quantities entered.
Solution: Open each PES feature's Explosives tab and enter the net explosive weight for the appropriate hazard divisions.
Features show as errors
Cause: Required attributes or facility type information is missing.
Solution: Check the feature's Errors tab for specific messages, then update the missing data on the Details or Attributes tab.
Related topics
- Feature explosives data — entering explosive quantities
- Feature attributes — setting facility characteristics
- Analysis symbology — customizing how results display on the map
- Drawings — exporting analysis results to drawings