Feature labels
Feature labels are the text Siter draws next to each feature on the map. You control what each label says (the label template) and how it looks (font, size, color, and so on). Labels are configured at two levels:
- a project default that applies to every layer, and
- optional per-layer overrides that replace the default for a single layer.
Prerequisites
- You must have an open project
- You must have the Project Edit Permission or higher to change label settings
How to set the project default labels
-
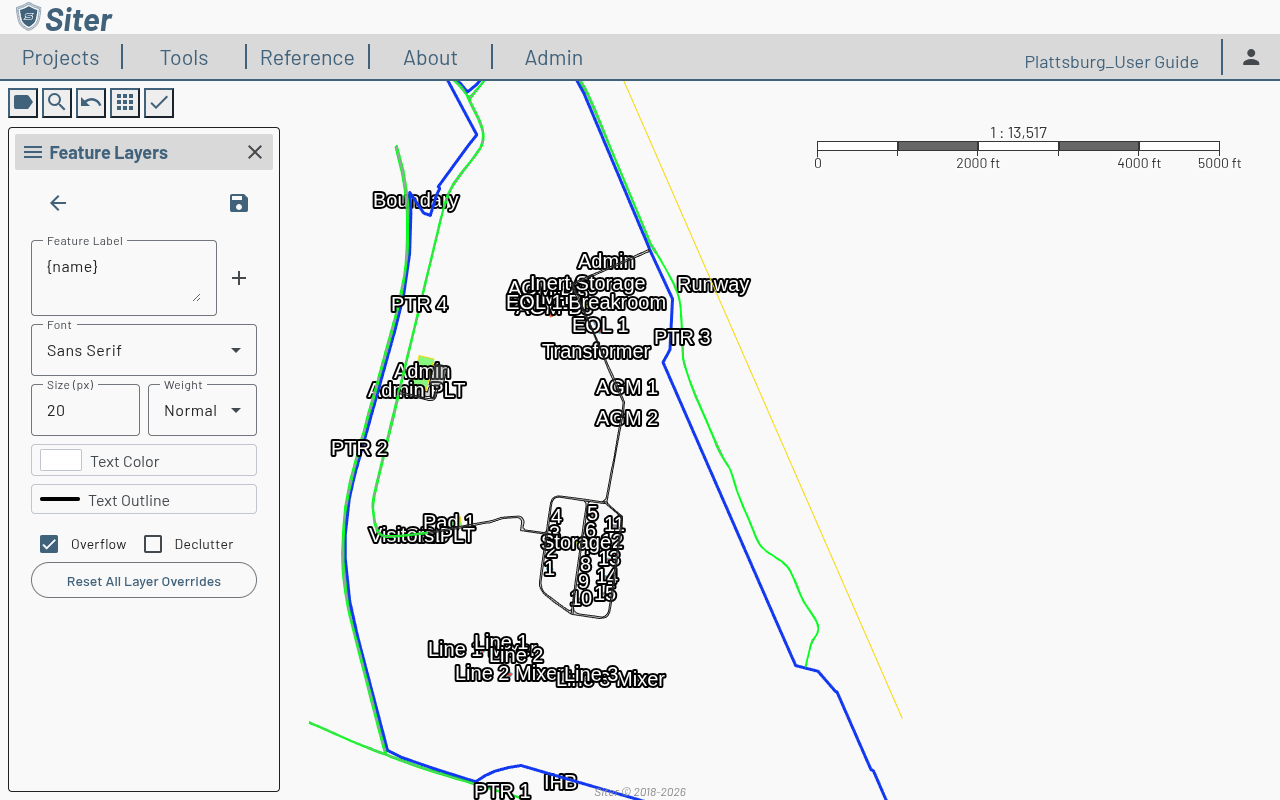
In the Feature Layers sidebar, click the Facility Label Options button (the Tt icon in the sidebar's toolbar)
-
The label editor opens:
-
Set the Feature Label template — the text each label shows. Type literal text and variable tokens (such as
{name}); see Choosing what the label shows below -
Adjust the styling:
- Font — the typeface
- Size (px) — text size (8–72)
- Weight — Normal or Bold
- Text Color — the fill color of the text
- Text Outline — the halo color and width drawn around the text for contrast
- Overflow — allow a label to extend beyond its feature's geometry
- Declutter — hide overlapping labels so the map stays readable
-
Click the save (floppy disk) icon to apply
Choosing what the label shows
The Feature Label field accepts any mix of literal text and variable tokens. Click the + (Insert variable) button next to the field to add a token:
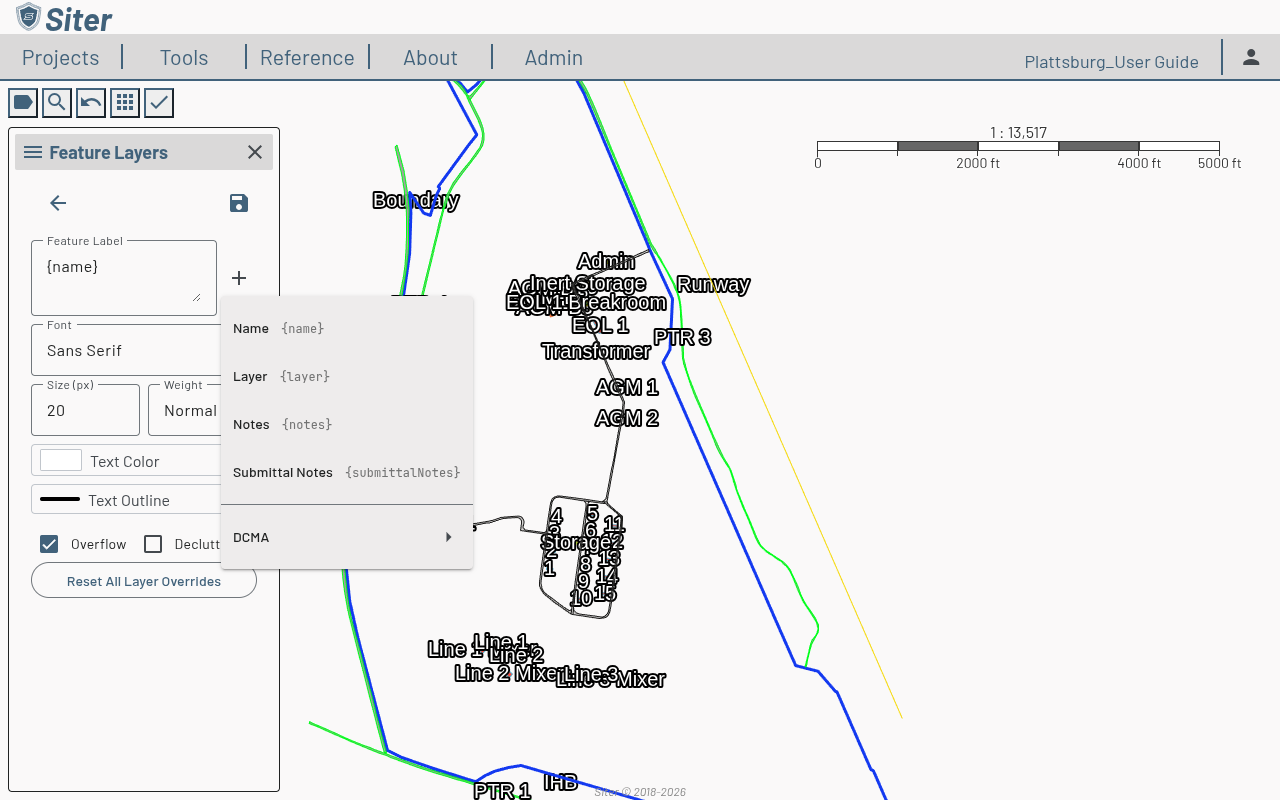
Top-level tokens apply to any feature:
- Name —
{name} - Layer —
{layer} - Notes —
{notes} - Submittal Notes —
{submittalNotes}
Each of the project's criteria (for example, DCMA) has a submenu that adds variables for every attribute and explosive value on that criteria:
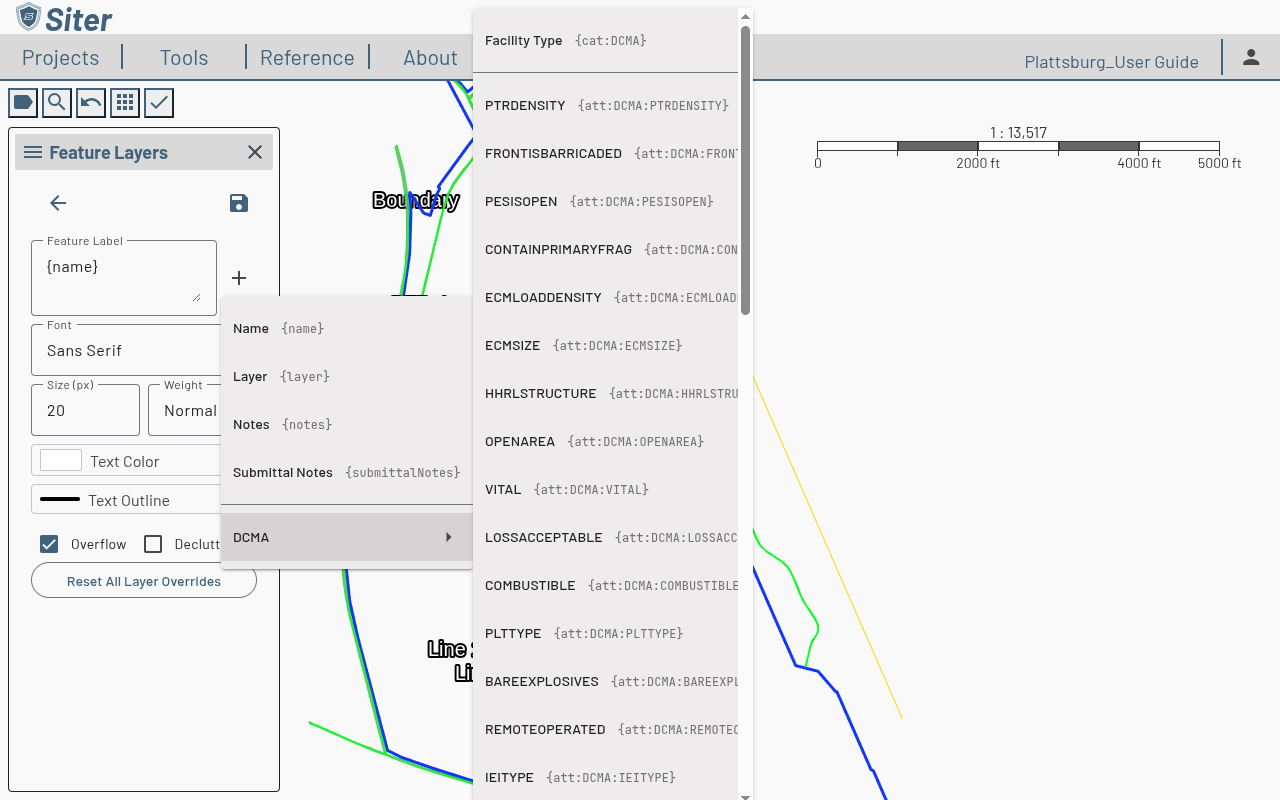
Combine tokens with literal text to build the label you want — for example, {name} — {cat:DCMA} shows the feature name followed by its DCMA facility type.
How to override labels for a single layer
A layer can use its own label settings instead of the project default:
-
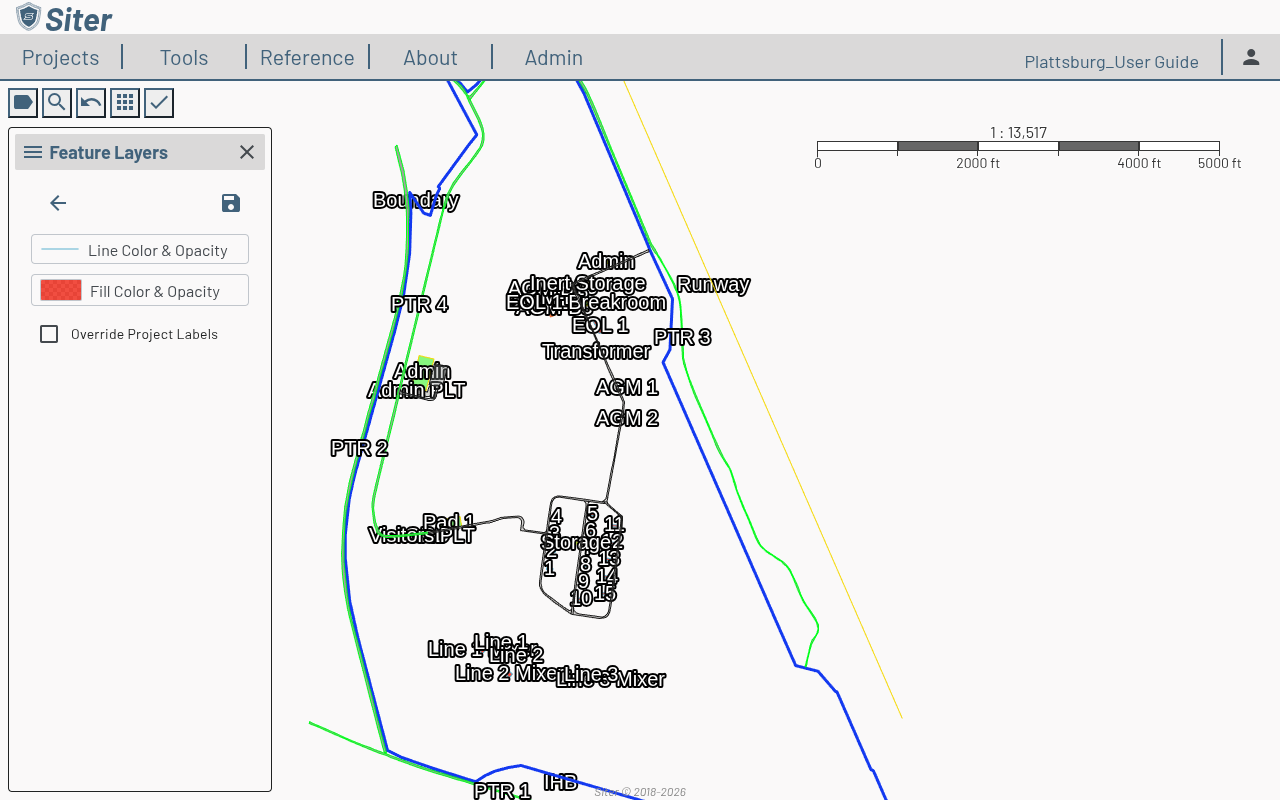
In the Feature Layers sidebar, click the layer's color swatch to open its symbol editor
-
Check Override Project Labels
-
The label editor appears for that layer — set its template and styling independently
-
Click save
The layer's labels now follow its own settings; all other layers continue to use the project default.
How to reset layer overrides
To return every layer to the project default, open the project default label editor (the Facility Label Options button) and click Reset All Layer Overrides. This clears the custom label settings on all layers at once.
Related topics
- Layers — add, organize, and manage layers
- Bulk editing — the Facility Labels bulk tool for editing many features' labels at once
- Features — the features your labels describe