All relationships
The All Relationships dashboard lists every relationship in the project in a single table — one row for each directional PES → ES pair, with a column for each criteria and a shared Barricaded column. Use it to review the whole relationship picture at once, spot a pair that is wrong, and fix it inline — without opening each feature's dashboard one at a time.
Added in v0.23.
Prerequisites
- You must have an open project with features and at least one relationship (relationships are usually generated from relationship groups or added on a feature's Relationships tab)
- You must have the Project Read Permission or higher to view the dashboard
- You must have the Project Edit Permission or higher to edit relationships
How to open the All Relationships dashboard
-
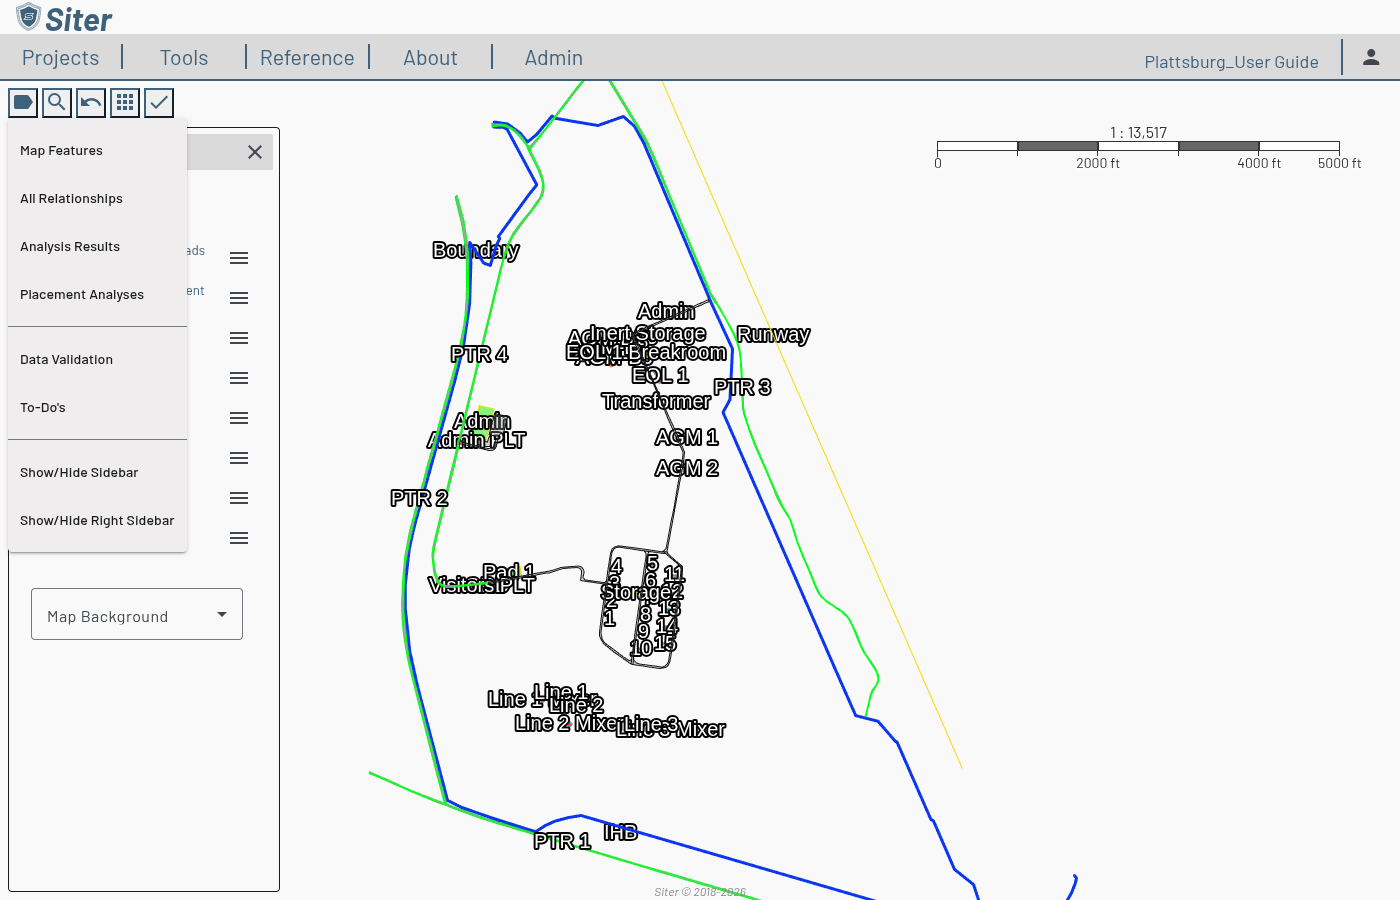
On the map toolbar, click the label menu
-
Select All Relationships
The dashboard opens as a footbar at the bottom of the screen. Use the panel control bar at its top to resize, dock it to the right, or close it.
How to read the dashboard
The table opens read-only, with one row per directional PES → ES pair:
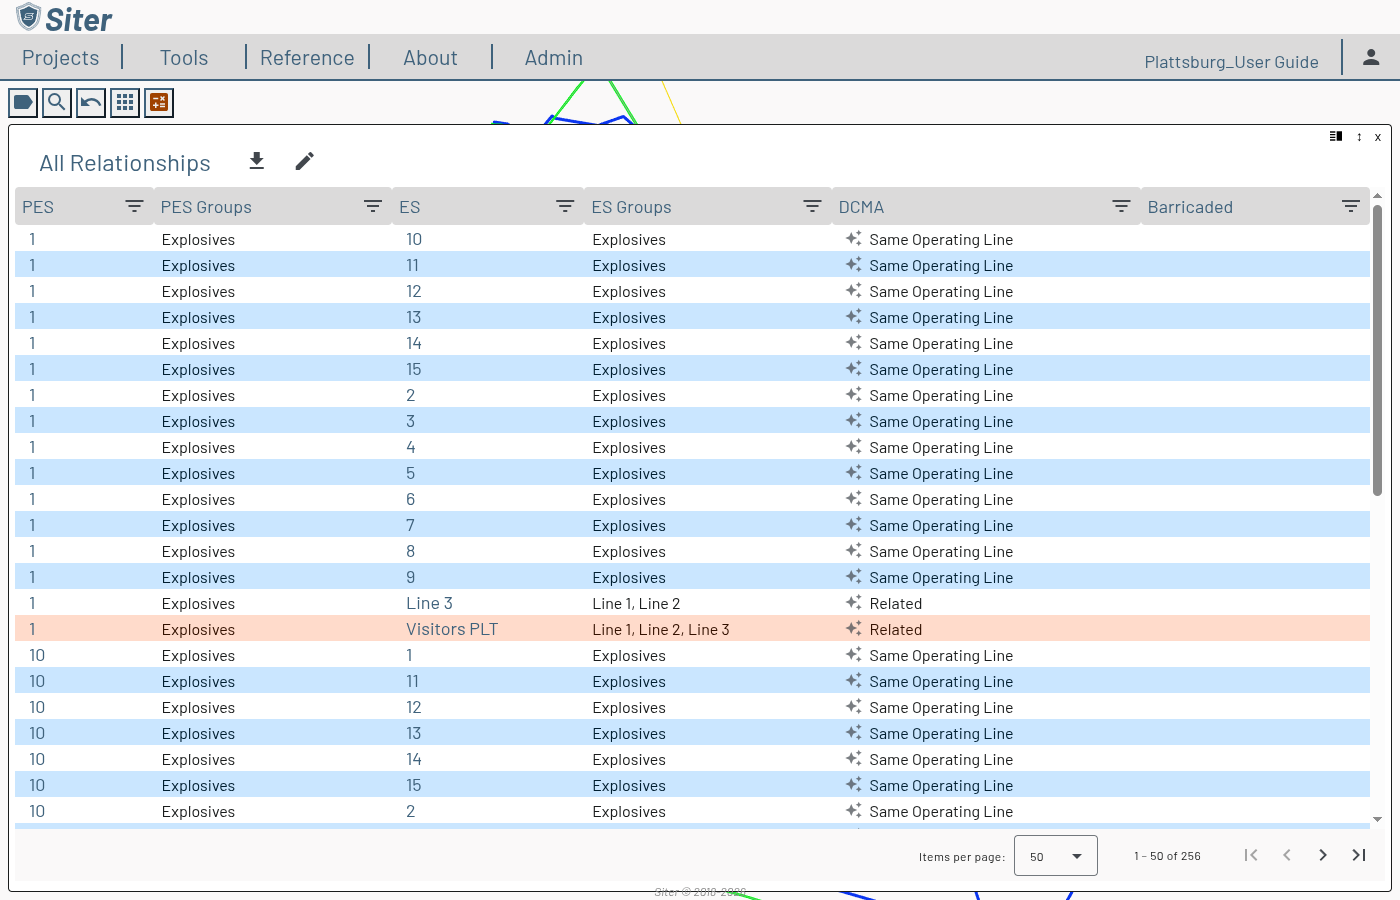
| Column | What it shows |
|---|---|
| PES | The potential explosion site of the pair. Click the name to open that feature's dashboard. |
| PES Groups | The relationship groups the PES belongs to. |
| ES | The exposed site of the pair. Click the name to open that feature's dashboard. |
| ES Groups | The relationship groups the ES belongs to. |
| One column per criteria (e.g. DCMA) | The relationship code in effect for that criteria, shown by its display name (e.g. Same Operating Line, Related). |
| Barricaded | Whether the pair is barricaded (Yes/No). Barricading is shared across criteria. |
Each criteria cell carries a small icon showing where its value came from:
- The auto icon means the code was generated by the relationship-group Build Relationships step.
- The lock icon means the value is user-overridden — the build will not change it.
The reverse pair (ES → PES) is a separate relationship and appears as its own row. A barricade change is non-directional, so it stays in sync across both directions.
Click any column's filter icon to narrow the table — for example, filter the PES or ES column to a few facilities, or the Barricaded column to Yes. Click a column heading to sort by it.
How to edit relationships
-
Click the edit (pencil) icon in the dashboard header. A colored border appears down the left edge of the panel to show you are now in edit mode
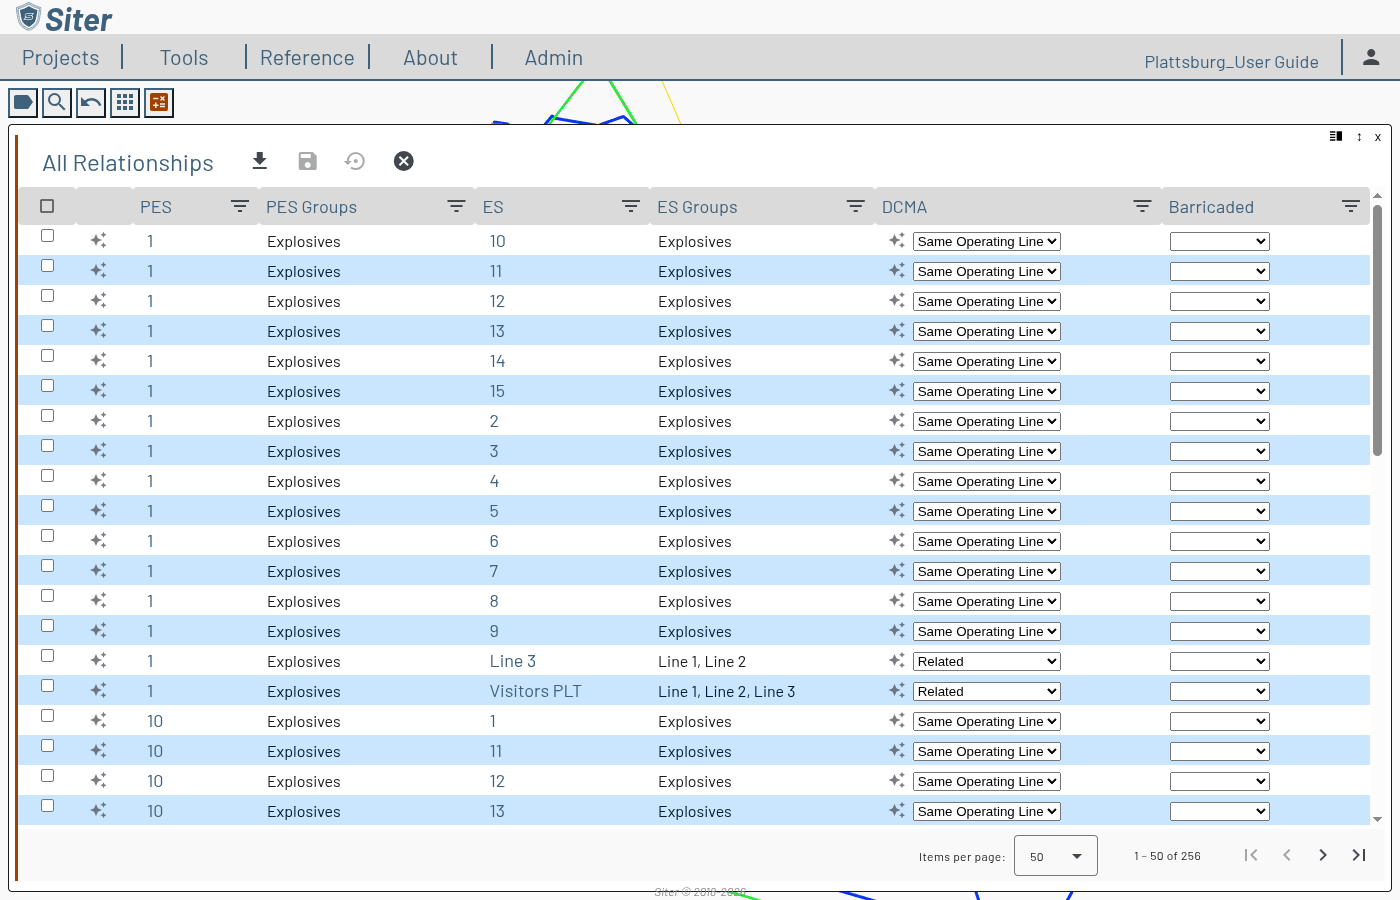
-
Change a pair's relationship by choosing a new value from its criteria dropdown, or its barricade status from the Barricaded dropdown. Editing a code automatically locks that cell as user-overridden
-
Click the save icon to keep your changes, the discard icon to revert them, or the done (X) icon to leave edit mode
Changes are batched — nothing is written until you click save. If you click done with unsaved changes, Siter asks whether to save first.
How to edit several rows at once
-
In edit mode, select rows using the checkbox at the start of each row. Click one checkbox, then shift-click another to select the whole range between them
-
Make an edit on any selected row — the same change applies to every selected row at once
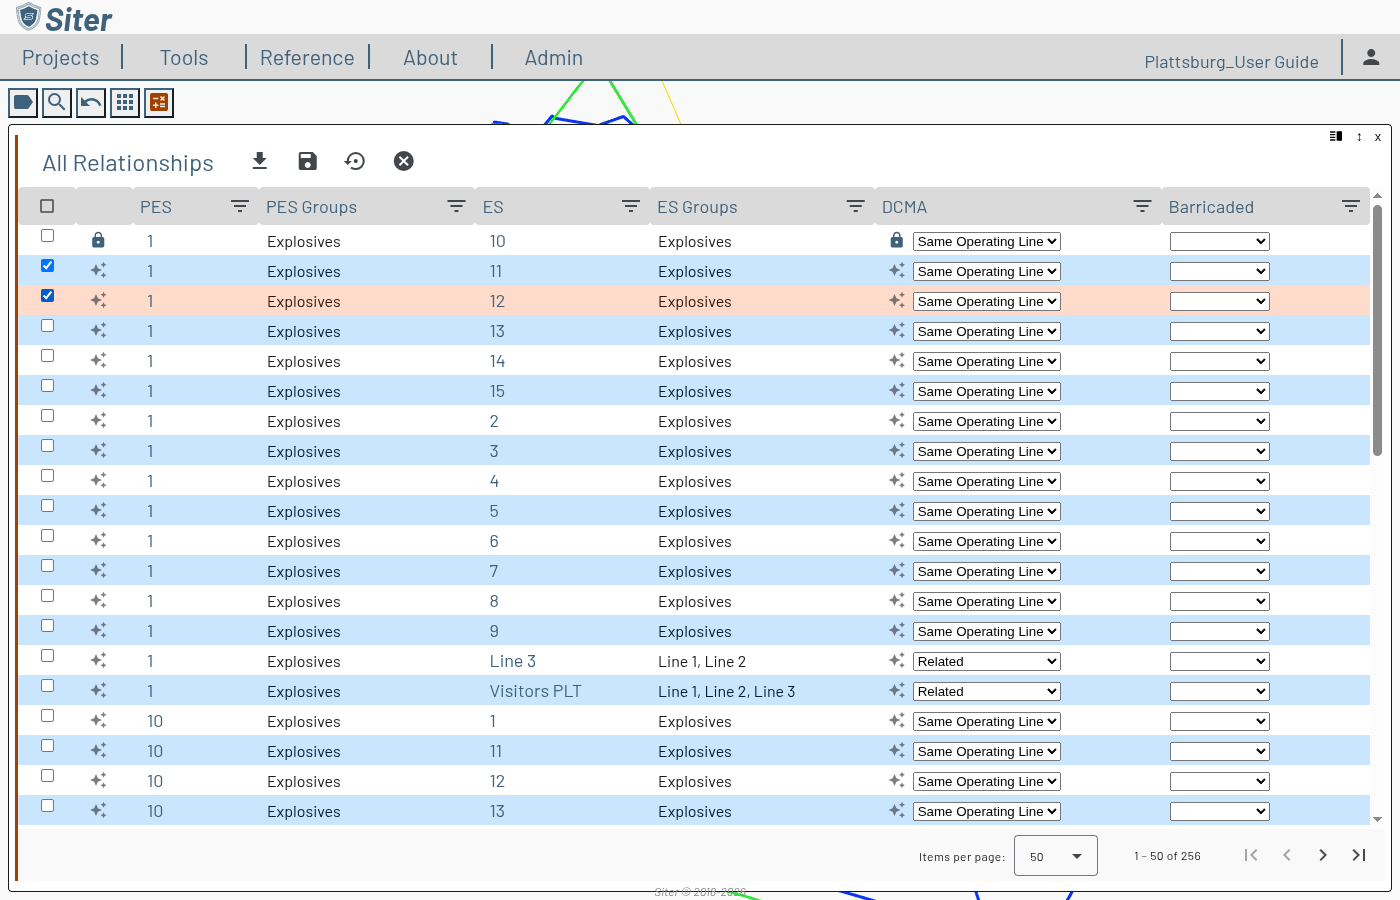
How to lock and unlock the build override
The lock controls whether the relationship-group build may regenerate a relationship. In edit mode, each criteria cell has a lock toggle:
- Click an auto cell to lock it — the build will no longer modify that code.
- Click a locked cell to unlock it — the next build may regenerate it from the matrix.
- Lock an empty cell to pin it as "no relationship," so the build will not add one there.
Use the lock icon in the leading column to lock or unlock every criteria of a row at once.
Locking a few cells lets you protect specific hand-tuned relationships while still re-running Build Relationships to refresh everything else.
How to export the relationships
Click the download icon in the dashboard header to export the current table to a CSV file. Export is available in both read-only and edit mode.
Troubleshooting
The dashboard shows "No relationships defined"
Cause: The project has no relationships yet.
Solution: Generate them from the Relationship Group Editor (Build Relationships), or add them on a feature's Relationships tab.
The edit icon is greyed out
Cause: You have read-only access to the project.
Solution: You need the Project Edit Permission or higher to edit relationships. Ask the project owner to grant access (see Sharing projects).
A relationship I edited came back after a build
Cause: The cell was not locked, so the relationship-group build regenerated it from the matrix.
Solution: Open the cell in edit mode and click its lock toggle, then save. Locked cells are preserved by future builds.
Related topics
- Relationship Groups — author a matrix and generate relationships in bulk
- Feature relationships — view and edit one feature's relationships
- Running an analysis — relationships decide which criteria apply between each pair